
The Socket Plan: Where Every Power and Data Point Goes in a New BTO
Socket heights, room-by-room counts and the points everyone forgets — how to draw a BTO power and data plan alongside the carpentry, while changing it still costs nothing.
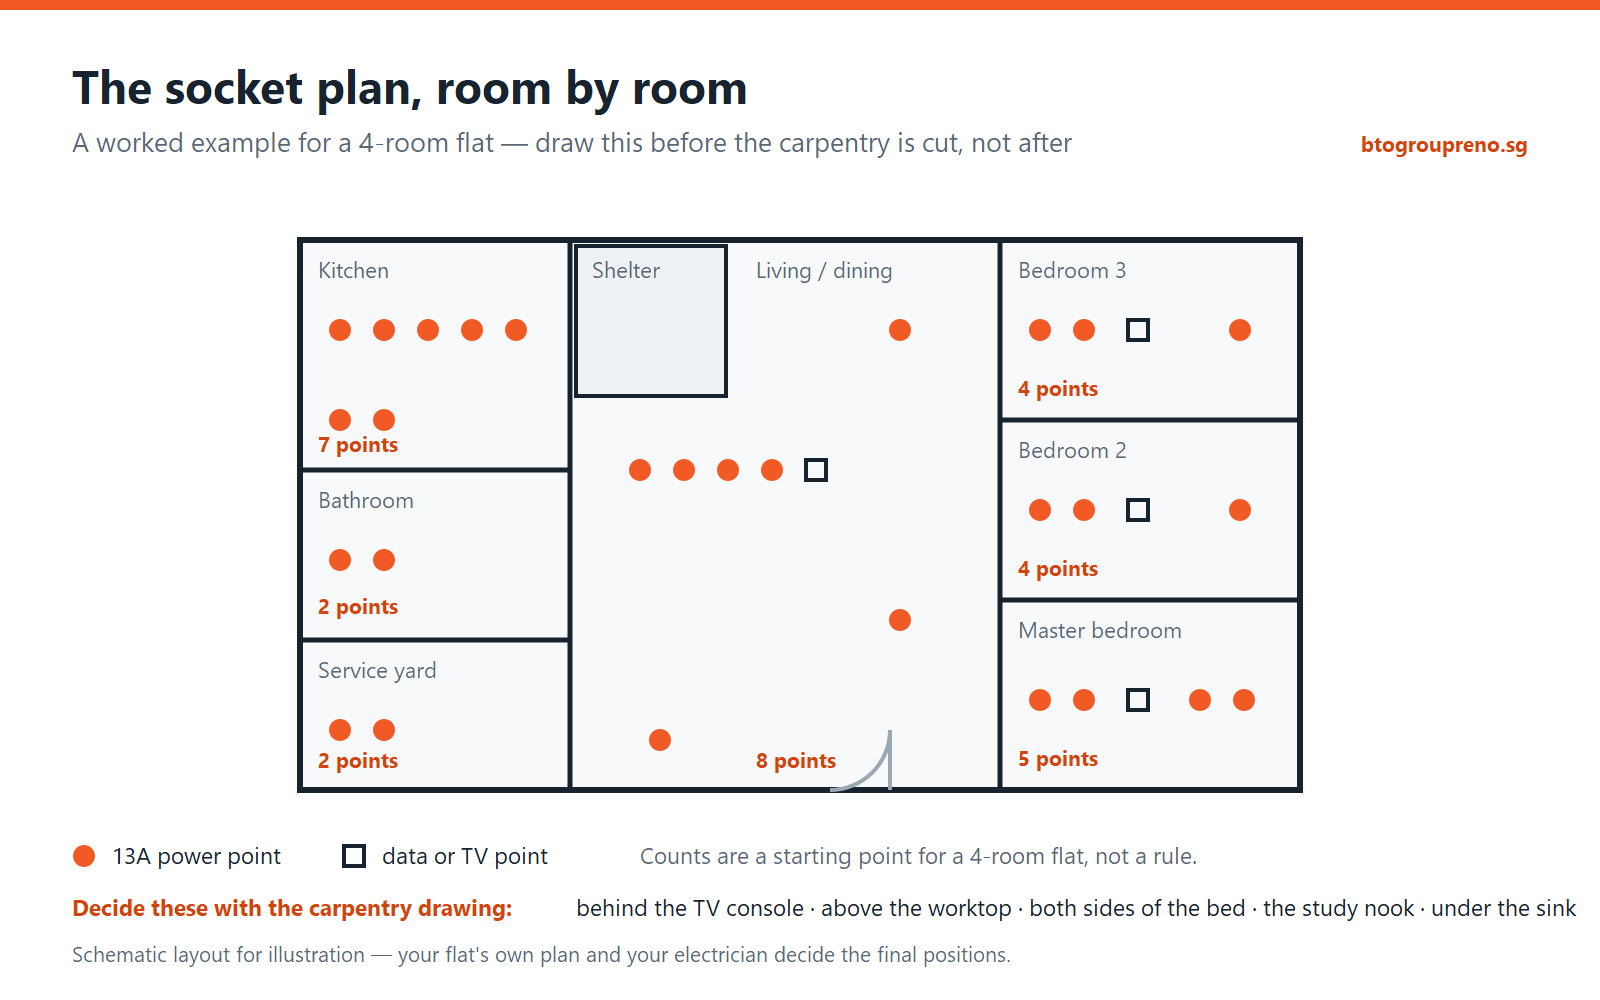
Nobody photographs their socket plan. It is the least glamorous drawing in a renovation and the one that generates the most regret — because every mistake in it is visible forever, usually as a white trunking line running across a freshly painted wall, or an extension cord snaking out from behind a wardrobe you paid good money for.
A new flat comes wired and compliant. It just isn’t wired for your furniture. Fixing that costs very little while the carpentry drawing is still open, and a lot afterwards.
Draw it against the carpentry, not the empty room
Decide these with the carpentry drawing, not after itBehind the TV console · above the worktop · both sides of the bed · the study nook · under the sink.
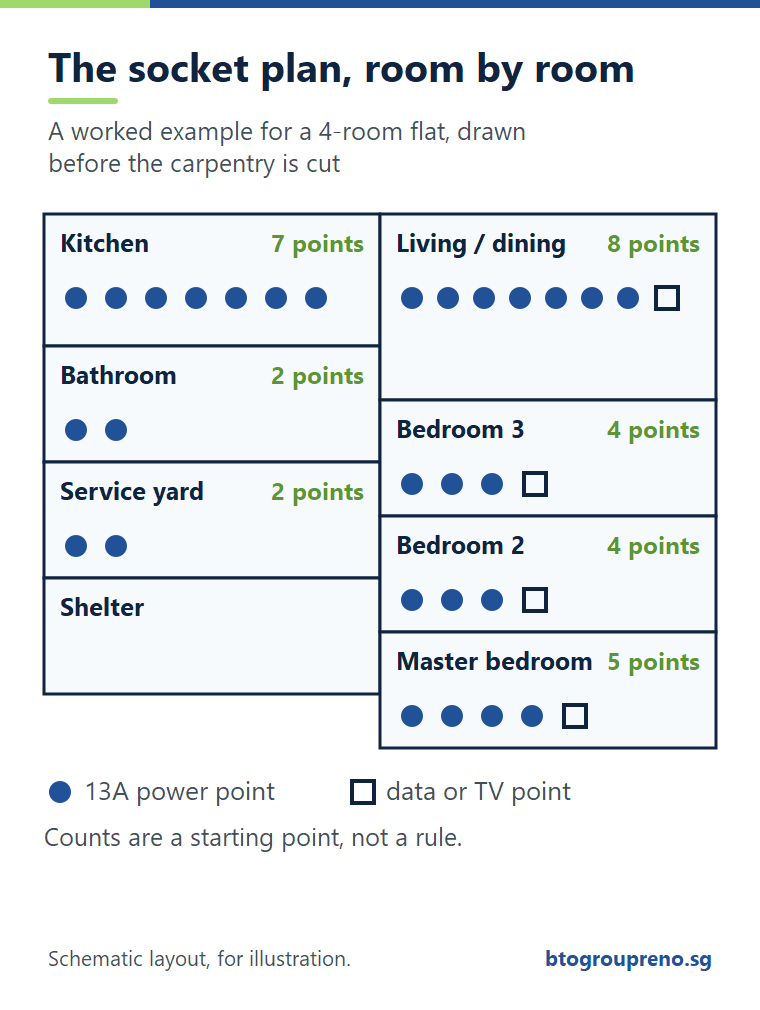
Counts are a starting point for a 4-room flat, not a ruleYour own plan and your electrician decide the final positions.
The single most useful habit: put the socket plan and the cabinet elevations on the same drawing. Once they’re together, the mistakes announce themselves — the point that lands behind the fridge cabinet, the TV feed that ends up 400 mm from where the console actually sits, the bedside point blocked by the wardrobe return.
This is also the practical argument for keeping electrical, plumbing and carpentry under one team: when the same people draw the cabinet and place the socket, there is nobody to blame and nothing to coordinate.
Heights: the numbers that stop the regrets
| Height | What goes there |
|---|---|
| 2100 mm | Aircon isolator — above the fan-coil, reachable from a step |
| 1800 mm | Water-heater switch — outside the shower zone |
| 1100 mm | Above the worktop — kettle, air-fryer, rice cooker, 150 mm clear |
| 850 mm | Kitchen worktop height, for reference |
| 300 mm | General sockets — living, bedrooms, behind the TV console |
The most-missed pointsBehind the TV console | both sides of the bed | under the sink | the study nook.
Indicative heights to finished floor level — your electrician and HDB rules have the final say.
- About 300 mm for general sockets in living areas and bedrooms — low enough to disappear behind furniture, high enough to reach.
- About 1,100 mm above the kitchen worktop, roughly 150 mm clear of an 850 mm counter, so plugs don’t fight the backsplash.
- About 1,800 mm for the water-heater switch, outside the shower zone.
- About 2,100 mm for the aircon isolator, above the fan coil.
Behind a suspended TV console, raise the points to console height so the cables hide inside the carpentry instead of dangling below it.
Room by room, what people actually forget
Kitchen. Count your small appliances honestly — kettle, air-fryer, rice cooker, coffee machine, blender — then add two. Reserve dedicated points for the hob ignition, hood, oven and any built-in microwave, and remember the one under the sink for a water filter or waste-disposal unit.
Living and dining. Four points behind the TV console minimum, plus the data point. One at the dining table’s wall for a hotpot or a laptop. One near the sofa end for lamps and chargers. One low point by the entrance for a robot vacuum’s dock — the classic afterthought.
Bedrooms. Two points on each side of the bed. One data or TV point. One at desk height if a study nook is going in. One inside the wardrobe if you want a charging drawer.
Bathroom and service yard. Water-heater switch, plus a shaver or hairdryer point outside the wet zone. In the yard: washer, dryer, and one spare for a drying rack or dehumidifier.
Household shelter. There is already a light and power point in there. Plan your shelving so it doesn’t block them.
Data, not just power
Wi-Fi mesh has made structured cabling optional, not pointless. One thing worth doing: put a data point where the router actually lives, and another wherever a mesh node will sit — usually the far bedroom. A wired backhaul between them is the difference between four bars and a video call that survives the kitchen.
The cost of getting it wrong later
Adding a point during first fix is a small line item. Adding one after the walls are finished means surface trunking, or hacking and making good, plus a repaint of that wall — and in a new flat you’re paying to damage something HDB just handed you in perfect condition. This is why the socket plan belongs in the same conversation as your budget, not after it.
Frequently asked questions
How many points should a 4-room flat have? The worked example above lands around 32 power points plus four data points. Your appliances decide the real number.
Can I move the DB box or the existing points? Moving points is routine electrical work under your renovation permit. The DB box is best left alone.
USB sockets — worth it? In a bedside and a kitchen position, yes. Everywhere else they date faster than the socket does.
When is it too late to change the plan? Once first-fix wiring is done and the walls are made good. Practically: decide before your carpentry drawing is signed off.
Get both drawings at once
Build your fit-out online and we’ll return the carpentry and the socket plan on the same sheet — free 3D preview before anything is cut.
btogroupreno.sg · WhatsApp +65 8852 6257 · Call +65 6222 3668
